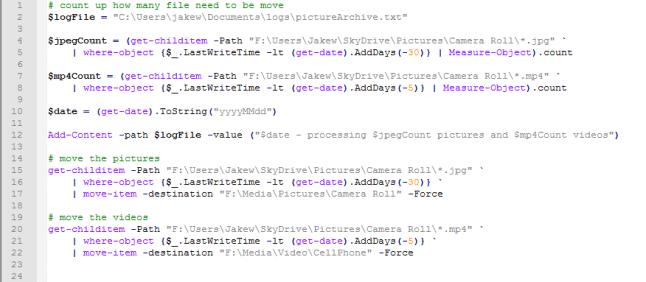
Getting started with Power Shell
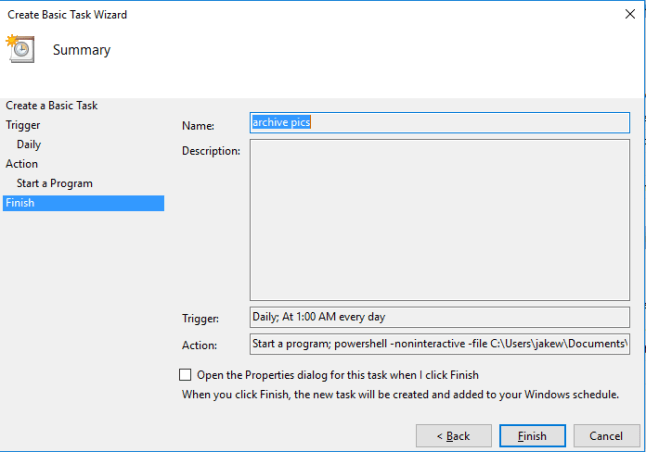
I make heavy use of PowerShell in a lot of difference scenarios. It allows me to automate work and free me so I can focus on other things. There are other scripting languages to learn (BASH for example) but if you’re running Windows you really should know PowerShell:
Getting Started with Windows PowerShell
This is a good starting point that leads to more stuff. Just start digging. Your machine should have powershell so you can play along.
ASP.NET Core
I come from a Microsoft Platform background so naturally this is what I use. The advantage that .NET Core offers me is that it runs nearly anywhere today so I can build applications for to run on iPhones, Android, Linux, iOS or even Windows. ASP.NET is how web sites are build, ASP.NET Core is the way to build web-sites that can be hosted wherever .NET core is running. In my case I’ll be targeting linux containers running various middleware packages (Apache and MySQL for example) that will be hosted in Docker environments (like OpenShift, Azure, AWS, etc). In addition to learning the ASP.NET stuff, you’ll also want to learn C#. It’s both easier and harder than JavaScript. Here are a few starting points:
C#
C# Fundamentals for Absolute Beginners
ASP.NET Core
You should also check out the Microsoft Virtual Academy which provides a lot of free training material. There is also Microsoft’s Channel 9 which is well worth you time.
Storage and Databases
Data has to be stored somewhere. There are a lot of choices available. To get things kicked off though I’m going to recommend you start off learning to use MySQL (google it yourself). Once you’re able to work that things like MongoDB and Microsoft SQL Server will be worthwhile to look at. You’ll also want to learn to use cloud storage like Azure Table and Blob storage.
You’ll end up learning SQL (Structured Query Language. You can pronounce it as sequel or squeal depending upon your mood).
The Cloud
You are going to want to know how to work with cloud offerings like Microsoft’ Azure and Amazons Web Services (AWS). Both are huge offerings with tons of features. Additionally, you’ll want to know about Docker and OpenShift because containers are becoming a very important feature of cloud ecosystems. You can get trail accounts for all of them and all of them offer extensive documentation and tutorials to help get you going:
Regarding free trials – don’t be abusive but I recommend creating an alternate email account (use outlook.com or gmail) instead of your usual email address. If you need more time just create a new one.
DevOps
DevOps is all the rage, but in a lot of ways it is not that big a deal. In my opinion, it is just the natural evolution of what we do. The goal is to shorten the time from having an idea to putting it in production. That really is all it is about. You’ll see terms like CI/CD thrown around (Constant Integration & Constant Delivery) but again: it’s not a big deal. It’s just learning to use the tools to full ability. However, there are a lot of tools out there. Typically, I like to choose just 1 tool and get very good at it. In many cases though you’ll find that there are many tools that do that same thing slightly differently and in some cases, you HAVE to use one particular tool because another tool you are using depends upon it. For instance: OpenShift depends upon Ansible for its deployment and maintenance. Ansible is like Chef the tool I’d actually recommend you learn to use. As a result: you will end up learning several different tools. This is sort of a catch all. But my top tools are:
- Visual Studio
- Docker
- Chef
- Jenkins
- Bash
You’re also going to want to learn Linux in addition to Windows. The entire ecosystem is changing and being just a Windows developer or just Linux developer doesn’t really work anymore. You want to be able to target anything and handle any situation.
So this should keep you busy for the day. I’ll have more stuff tomorrow. Enjoy