[Source code is available on GitHub]
A Docker Stack is a collection of services that make up an application. In this case our stack will consist of an ASP.NET MVC Core web-page, a MySQL database and a load balancer. Doing this using Docker didn’t really pose any significant challenges, but it did remind me to not over look good practices just because I’m throwing together sample code.
What did I do?
Over the past few weeks I’ve been very focused on mastering Docker and I viewed this project as a sort of final to demonstrate how I’d use Docker for a real application. As already mentioned, the sample application is just a plane old web page that reads data from a database and stores data in a database. This is what most web-applications do.
I elected to use MySQL as the database for a couple of reasons. First and most importantly I wanted to learn it. Second it is much smaller that Microsoft SQL Server so putting it in a container makes sense, sort of. Third, it is supported by Entity Framework and would work in the environment of my application.
I also create a YML file with instructions for Docker-Compose to setup the services I wanted to deploy. I also created a pair of DockerFiles to create my images.
Most of this is supported by Visual Studio using its Docker support. However, there are aspects of Visual Studio’s Docker support that fall short of what I think developers really need. Primarily, you’re not entirely in Docker when you’re debugging. Also, your application is compiled outside of the container and the output is made available to the container via a volume. Finally, debugging doesn’t attach to the container. You’re running the code on your workstation and pretending you’re in the container.
My approach takes you out of Visual Studio and to the command line to build your application. In a different post I’ll dig in to how to debug an application that is running in a container.
The Full Sample
FullSample is an ASP.NET MVC Core application that uses Entity Framework to read and write data stored in a MySQL database. I’m still using .NET Core 1.1.2. There is no technical reason for this, I just haven’t expended that huge amount of strength it would take to change that drop down to 2.0. I’m resting up in preparation for that adventure.
Setting up the data model
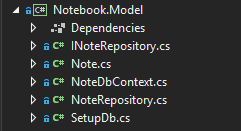
I prefer to keep different components of my applications in separate projects. After creating the initial ASP.NET MVC Core project and solution I added a library project to the solution to separate the data model from the rest of the application. This is my normal practice and supports things like reuse and making the components easier to unit test.
This project has references for Microsoft.EntityFrameworkCore and Pomelo.EntityFrameworkCore.MySql. The rest of the project is the usual Entity Framework set of classes and interfaces. The point here is that there isn’t really anything unusual going on.
Setting up the database
Entity Framework provides a way to create database tables and relationships based on the model being used. However, I prefer to create the database DDL myself using SQL. This is primarily because in most cases I encounter databases have already been created or are controlled by separate teams that don’t like developers just throwing tables on their server in the fashion EF does it.
To create the database and its tables I just added a solution folder to hold my SQL files. With SQL Server I’d create a database project to handle this. Because I’m still new to MySql I wasn’t aware of any tools to help me so I’m just using some files to get the work done.
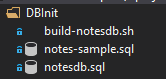
In addition to the SQL files I also wrote a very simple shell script that we’ll use later to run the SQL files against MySql.
Hooking up ASP.NET MVC
The sample application uses the HomeController to read notes from the database and display them in a grid. HomeController also provides a handler for post backs to create new notes in the database.
Lesson learned
Nothing at this point is controversial. It’s just a basic web-application that reads and writes data from a database. For debugging, I switched the startup project from the Docker project to NoteWeb so I could just hit F5 to walk through my code.
One challenge is that I needed to start up and initialize the MySql container before I started debugging. Most of the time I just left MySql running. Another approach I could have used would be to setup a volume for the MySql container so the database would persist between session. I’ll examine this further in a moment.
The next challenge I ran in to was being a bone head. I should have written unit tests for my data model. I wasted a lot of time chasing issues that didn’t matter. This project got spread out over a couple of weeks and I forgot changes I made during different sessions. Having a unit test framework setup would helped save me time. At some point the EF data model was looking for a table called Notes and the SQL script was creating a table called Note. Naturally this caused things to blow up.
Moving in to Docker
Moving the project in to Docker was straight forward. Locally, I work with my code like I always do: write unit tests, write code, run in the debugger, test, repeat. Once I’m happy with my code I commit it to GitHub.
The Docker build image I described earlier is already setup for this scenario. The DockerFile for this project just needs the URL to the GitHub repository and we’re good to go:
# FullSample
#
# Compile the solution inside a docker container and then copy the results in to the final image
#

# Build stage 1 - compile the solution/application
FROM jakewatkins/ancbuildenv AS builder

WORKDIR /source

# copy the solution in to the image
RUN git clone https://github.com/jakewatkins/DockerFullSample.git /source

# restore the solution's packages
RUN dotnet restore

#build the solution
RUN dotnet publish --output /app/ --configuration Debug

# Build stage 2 - build the container image
FROM microsoft/aspnetcore:1.1.2
WORKDIR /app
COPY --from=builder /app .

EXPOSE 80/tcp

# Set the image entry point
ENTRYPOINT ["dotnet", "NoteWeb.dll"]
All this DockerFile is doing is grabbing the project from GitHub, building the project and then copying the build output in to the final image.
The benefit of this approach is that the project will be build the same way regardless of where the DockerFile is run. This avoids issues around team members having different configurations or patches. The solution is always built the same way.
This is great for constant integration (CI). The only thing missing is running a battery of unit tests against the results, but we’ll cover that with another post.
Creating the MySql Image
My solution just uses a plain MySql image. I don’t customize the image in anyway. However, I do need a way to get my database and some sample data in to the MySql instance that gets started in a container when the image is run. To do this I use another container to do the actual database build.
Creating a MySQL Build image
In a previous post I demonstrated how I created an image with the MySql client and the Git client. Using that image as the starting point we use Git to download the project and then setup the shell script as the entry point for the image. We also add environment variables to the image that provide needed information for connecting to MySql
The shell script waits for MySql to become available and then uses the MySql client to execute the SQL files in our project:
#!/bin/sh
# build the notes database
mysqladmin -u root -p$MYSQL_ROOT_PASSWORD -h$DBHOST ping --wait

# load the DDL
mysql -u root "-p$MYSQL_ROOT_PASSWORD" -h$DBHOST < /source/DBinit/notesdb.sql

# load some sample data
mysql -u root "-p$MYSQL_ROOT_PASSWORD" -h$DBHOST <span 				data-mce-type="bookmark" 				id="mce_SELREST_start" 				data-mce-style="overflow:hidden;line-height:0" 				style="overflow:hidden;line-height:0" 			></span>< /source/DBinit/notes-sample.sql
The DockerFile for the image looks like this:
FROM jakewatkins/mysql-db-build:1.1

RUN git clone https://github.com/jakewatkins/DockerFullSample.git /source \
			&& chmod +x /source/DBinit/build-notesdb.sh

ENTRYPOINT ["/source/DBinit/build-notesdb.sh"]
That’s it. This demonstrates the benefit of creating base images that are setup to work with your workflow. Because I already had the mysql-db-build image ready to go I just had to write 3 lines in a DockerFile.
One consideration in doing these custom base images is size. We want them to be as small as we can get them to speed up our processes. Images have to be downloaded, copied and executed. If they are big each step is going to take longer. I’m a little impatient so if it takes too long to do something I’m likely to skip it.
Docker-Compose
Docker-Compose is a separate component of Docker. Its function is to orchestrate the configuration and execution of different components in a Docker solution. In our application we have 4 containers on two networks to coordinate.
version: "3"

# for production create a volume to hold the notes database
# In development we're not going to bother
#volumes:
#  notesdata:

networks:
  frontend:
  backend:

services:

  mysql:
    image: "mysql:8.0.0"
    networks:
      - backend
    ports:
      - 3306:3306
    environment:
      - MYSQL_ROOT_PASSWORD=mysecret
      - bind-address=0.0.0.0

  dbinit:
    build:
      context: .
      dockerfile: dockerfile-builddb
    networks:
      - backend
    environment:
      - MYSQL_ROOT_PASSWORD=mysecret
      - INITDB=true
      - DBHOST=mysql
    depends_on:
      - mysql

# the source for our application has to be pushed to GIT before building
# the image
  mvc:
    build:
      context: .
      dockerfile: Dockerfile-selfcontained
    networks:
      - backend
      - frontend
    ports:
      - "5022:22"
    environment:
      - ASPNETCORE_ENVIRONMENT=Development
      - MYSQL_ROOT_PASSWORD=mysecret
      - DBHOST=mysql
      - DBPORT=3306
    depends_on:
      - mysql

  loadbalancer:
    image: dockercloud/haproxy:1.2.1
    ports:
      - 3000:80
    links:
      - mvc
    volumes:
      - /var/run/docker.sock:/var/run/docker.sock
    networks:
      - frontend
To build the solution we go to the command line and execute
Docker-compose build
Mysql and loadbalancer will be skipped because we’re just using the raw images. Dbinit and mvc will be built. Once they have finished we can start bringing up the solution by getting the database started:
Docker-compose up dbinit
This will cause dbinit and mysql to be started. The shell script in dbinit will wait until mysql has started before executing the other steps. Once it is finished the dbinit container will exit but the msql container will keep running and be ready to serve up the Notes database.
Next we start mvc:
Docker-compose up -d loadbalancer
In this case I’ve added the ‘-d’ flag to the up. This tells docker-compose to start loadbalancer but leave it disconnected from the console. In the case of dbinit I didn’t use the ‘-d’ flag because the image exits when it has finished its work.
Because loadbalancer has a link to mvc and mvc depends upon mysql it will cause them to be started as well. We already started mysql so nothing happens there, but mvc will be started.
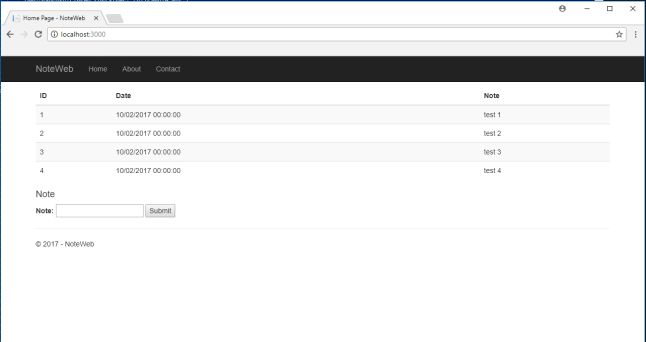
To test out solution out we can open a web-browser and point it to http://localhost:3000 and we should see something like:
Lessons learned
This is the point where I ran in to trouble. Mostly because I got busy with other projects and had large gaps of time between sessions on this project. Between getting the web application running and getting the DBInit image working I changed the Notes table to be the Note table. Because I didn’t have unit tests I didn’t have an automated way to catch this goof up.
As a result, my images all built and would start up without any trouble. But trying to access the application it would crash. I initially did not have the ASPNETCORE_ENVIRONMENT environment variable set so I was getting the useless error page. However, it did tell me to add ASPNETCORE_ENVIRONEMT=Development to get the useful error page. Once I added that the issue was revealed and I wished I had taken the time to write some unit tests.
Conclusion
At this point I’ve walked the path from barely understanding Docker to being able to build realistic solutions that can be deployed in Docker. The basic things we’ve seen with this solutions is that our past skills don’t really change just because we are going in to a container.
